You can arrange home office furniture to create a calmer workspace, faster access to tools, and a posture-friendly setup that supports deep work. The result is less reaching, fewer distractions, and a layout that feels intentional from the moment the day starts. How to arrange home office furniture is the subject this guide addresses directly.
Most home offices fail because desks, chairs, and storage compete for the same space. When the monitor sits too low or the chair blocks movement, productivity drops and minor discomfort becomes a daily routine. A thoughtful ergonomic desk setup also helps people work longer with less strain. The problem? Most guides skip the how to arrange home office furniture part of the process.
Furniture layout guidance from occupational health and ergonomics research consistently links proper monitor height and reach comfort to reduced musculoskeletal stress. Here’s where the how to arrange home office furniture details get tricky.
After reading, they will be able to position the desk, set monitor height, and plan chair clearance around the work area. They will also learn practical cable management steps and a simple work triangle approach to keep frequently used items within easy reach. The problem? Most guides skip the how to arrange home office furniture part of the process.
How to arrange home office furniture is a planning method for a functional workspace
How to arrange home office furniture is a planning method that turns room constraints into predictable work flow. Most people fail when they treat layout as aesthetics, not as an ergonomic desk setup with measurable reach and posture outcomes. The goal is to design a system where tasks move smoothly between tools, screen, and seating.
One-liner: A functional workspace forms when the primary work zone stays within comfortable reach from the chair.
In practice, a planner should start with the work triangle concept, then lock in chair clearance before placing storage. In a typical setup, a remote worker places the keyboard and mouse centered, keeps the monitor at eye level, and leaves at least 5 cm behind the chair for natural back movement. This sequence prevents later changes that force awkward neck angles and repeated standing adjustments.
For an evidence-based layout test, they can run a 15-minute “reach check” after arranging the desk. He should sit in the chair, perform five cycles of typing, filing, and referencing, and stop if he must lean more than 10 degrees or swivel repeatedly. When problems appear, the fix is usually moving the desk 20–30 cm closer to the reference surface, not changing the chair.
A common misconception is that cable management is cosmetic, yet it determines whether the workspace stays stable during daily motion. If cords cross the chair path, she will subconsciously pull the chair forward, shrinking chair clearance and shifting monitor height over time. For that reason, how to arrange home office furniture should include routing cables behind the desk or along the perimeter before finalizing positions.
When the desk location is set, they should confirm monitor height relative to seated eyes and keep the keyboard centered to reduce wrist strain. A practical implication is simple: once the work triangle is correct, productivity improves because transitions between tasks require fewer body movements. Near the end of setup, they can re-check the same reach test after adding lamps, chargers, and notebooks, then fine-tune the final placements.
What measurements and constraints should you map first?
When readers start how to arrange home office furniture, they should map constraints before aesthetics because the room will dictate the layout. Most failures come from ignoring circulation and door swing, not from choosing the wrong chair. This section focuses on measurements that prevent rework.
He should begin with reach, clearance, and access, then move to power routing and lighting behavior. The goal is a usable ergonomic desk setup that supports the work triangle without forcing awkward reaches. She can treat every dimension as a constraint that the desk and chair must respect.

Measure for reach, clearance, and door swing
Measure once, then build around the numbers. Reach and clearance decide whether the chair clearance stays functional during long sessions. It also determines whether the keyboard, mouse, and monitor can sit inside comfortable limits.
- Work reach — With the chair at the target depth, measure 15–20 cm beyond the keyboard for effortless mouse motion.
- Clearance envelope — Leave 60 cm in front of the desk edge for knees, chair clearance, and safe standing transitions.
- Door swing — Measure the door arc clearance at floor level and at 90 cm height where bags and knees may pass.
- Cabinet and walkway — Mark a continuous walkway width of at least 80 cm so they can move without snagging cords.
Plan power and cable paths before placing desks
He should plan cable management before final positioning so the desk does not block outlets or force extension leads across walkways. In an office with two wall outlets 30 cm apart, placing the desk 10 cm too close can require a 2 m cable run that interferes with chair legs. That outcome is avoidable if the outlet location is treated as a fixed constraint.
She can mark a “cable zone” along the desk’s underside and behind the chair to keep cords out of the work triangle. This step also protects monitor height adjustments by preventing cable tension when the monitor arm is repositioned. For an ergonomic desk setup, cable slack should be sufficient for small movements, not for full re-anchoring.
Account for light, glare, and screen orientation
He should measure where daylight lands across the work surface to control glare and improve monitor readability. The most common mistake is placing the monitor facing a window, then compensating with brightness changes that strain eyes. In a room where the window sits 45 degrees to the desk, rotating the screen 15 degrees can reduce glare without changing the chair clearance.
Finally, they should validate the full layout against how to arrange home office furniture constraints by re-checking reach, door swing, and outlet access after the monitor is set. When the monitor height and screen angle match the light path, the work triangle stays stable during daily use. She can then lock the position with confidence and avoid later rearranging.
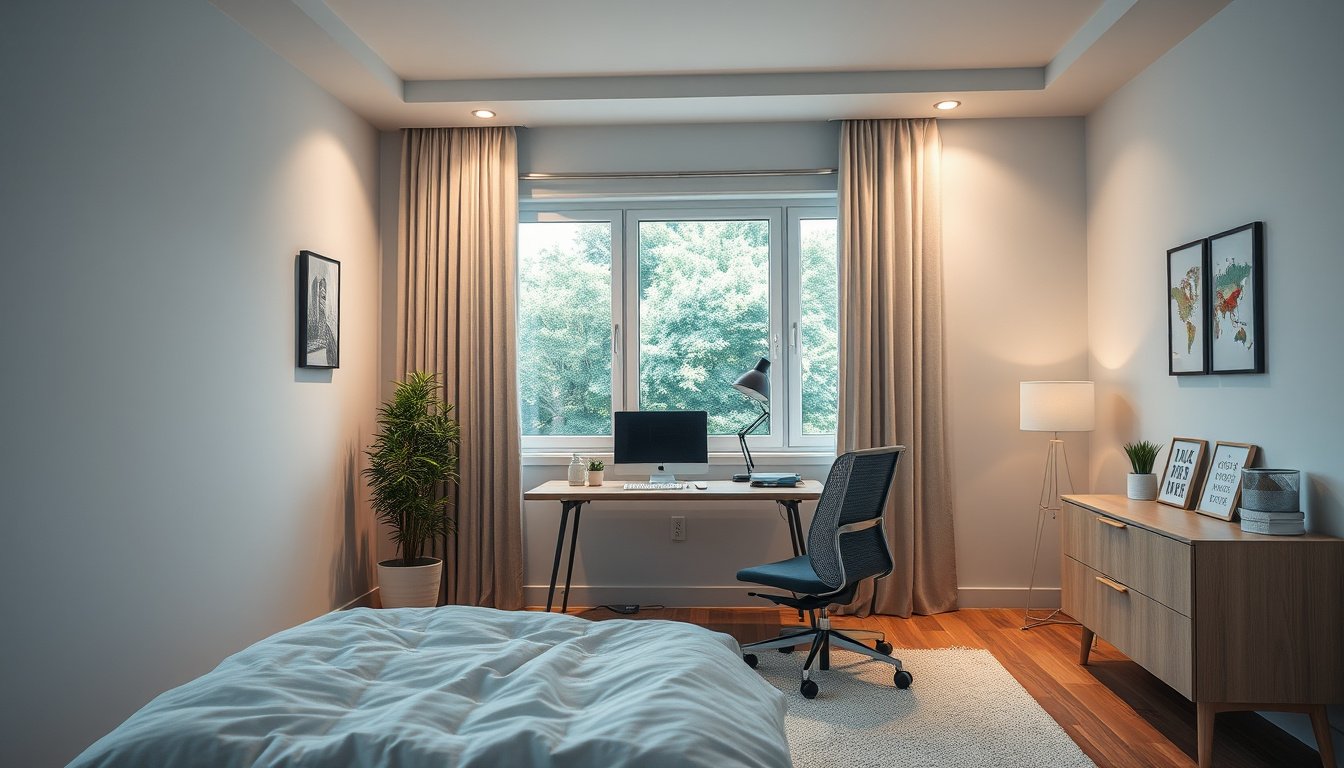
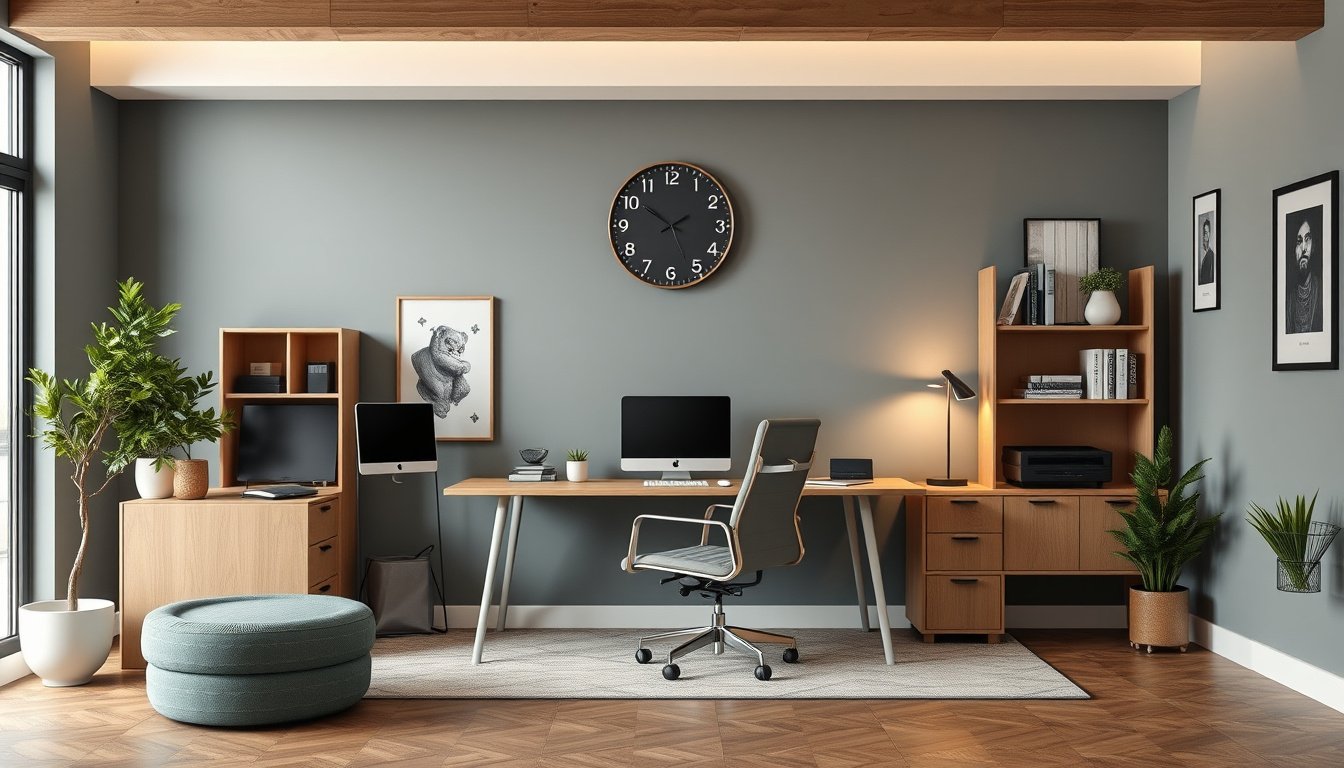
Step 1: Place the desk for workflow, light, and ergonomics
When someone follows how to arrange home office furniture with desk-first placement, the rest of the setup becomes easier to maintain. Most failures happen because the desk blocks daylight or forces awkward reach, not because of chair quality. In practice, he should map the work triangle early, then commit the desk location before buying accessories.
One-liner: Desk placement determines the quality of every later ergonomic desk setup decision.
- Assign the 3-zone workflow by marking primary work, reference, and tools on the floor before moving the desk. Primary work should sit where the dominant hand reaches straight, reference should land within a short glance, and tools should stay at the edge of the work surface. This layout reduces reaching and supports a stable work triangle during long sessions.
- Set chair and monitor height for neutral posture before finalizing the desk position. She should aim for monitor height so the top third of the screen aligns near eye level, then adjust the chair until elbows rest around 90 degrees. After that, chair clearance must allow the knees to move freely without the desk edge cutting into the thighs.
- Orient the monitor to reduce glare and reflections from windows and overhead lighting. He should place the screen so bright sources fall outside the line of sight, then tilt the monitor slightly to keep reflections off the glass. If glare persists, he should rotate the desk a few degrees rather than relying on software brightness changes.
- Confirm cable management paths while the desk is still movable. They should route power and data cords under the desk toward the outlet and router, leaving a gentle service loop for chair movement. This prevents tension that later pulls the desk or blocks drawer travel.
- Use a concrete placement test to prevent rework. A home worker with a desk depth of 30 inches placed the desk 24 inches from the window and kept the monitor 20 inches from the face, then measured glare at 10 a.m. The setup stayed usable for two weeks because chair clearance and monitor height remained unchanged.
Finally, they should re-check how to arrange home office furniture after cables are connected, because cord drag can shift the desk by even a few centimeters. If chair clearance shrinks, they should correct desk position immediately, not after hours of daily use.
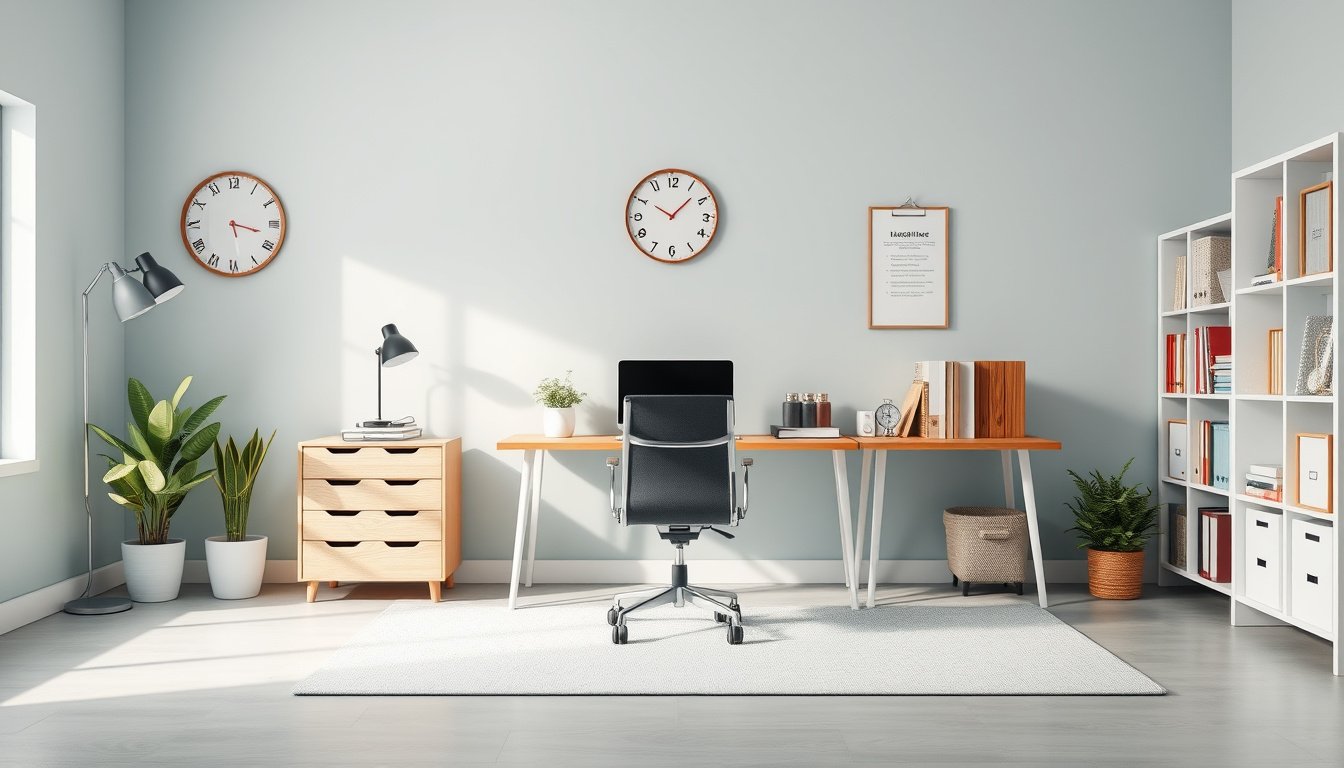
Step 2–4: Add storage, seating, and circulation without blocking movement
When he plans how to arrange home office furniture, he should treat storage and seating as movement constraints, not decoration. Most people fail here because they place cabinets where elbows and chair legs travel, not because they lack storage. The goal is to keep clear paths while completing an ergonomic desk setup.
He should start with a circulation loop that reaches the chair, the desk edge, and the main storage zone without crossing the work triangle. In a 10 ft by 12 ft room, he can set a 30 in wide walk lane between the desk side and a bookcase. This prevents chair clearance from shrinking when she pulls back to stand or when he reaches for a file.
Concrete rule: place storage so every frequently used item is reachable from the seated position without leaning past the desk edge. He can label drawers for daily use, keep weekly supplies in the next reach zone, and store rarely used items on the top shelf or behind a closed cabinet. This structure reduces stand-up trips and keeps surfaces clear.
Match storage to frequency
They should assign locations by use rate, then confirm reach distances from the chair. Daily items belong within arm span, weekly items within a short step, and rarely used items in high or low zones that require a deliberate reach. Cable management and vertical space planning should follow the same logic.

He can test the layout by simulating a morning workflow: laptop start, notebook open, then file retrieval. In a case where a remote worker moved a printer stand into the foot path, chair clearance dropped by 6 in and the loop became awkward. After relocating the stand to a closed cabinet side, the walk lane stayed clear and movement felt continuous.
Create a clear circulation loop around the desk
They should place seating so the chair rotates toward the storage zone without scraping the desk leg. He can keep the monitor height consistent with the desk position, then avoid shifting the desk later by anchoring heavier storage first. The circulation loop should remain usable even when the chair is pulled back.
He should confirm the loop with a full-body check: stand at the doorway, walk the lane, and pull the chair out once. If the chair blocks the lane, he should move the cabinet, not the chair, because repeated desk adjustments disrupt the work triangle. This preserves consistent ergonomic desk setup behavior.
Use cable management and vertical space to keep surfaces clear
They should route power strips and charging bricks behind the desk plane, then secure slack to a fixed path. He can mount a cable tray under the desktop and use vertical raceways to route to a nearby cabinet, keeping the desk edge uncluttered. Surfaces stay usable for writing and device placement.
Before finalizing, he should re-check how to arrange home office furniture near the end of the setup by testing reach, chair clearance, and cable drag together. If a cord tugs the desk even slightly, the loop will narrow and movement will feel constrained. This final check protects the circulation plan and supports stable daily use.
- Place frequently accessed storage at seated reach, then verify it with one complete work cycle.
- Keep a dedicated walk lane wide enough for chair pull-back and side steps.
- Route cables behind the desk plane and secure slack to prevent desk movement.
- Re-test circulation after all storage is in place, including one chair pull-out.
Step 5: Test the layout—does it support focus and easy access?
When they apply how to arrange home office furniture, they should validate access before finalizing placement, because small placement errors compound during daily work. The claim is straightforward: most people fail this step by testing only standing access, not seated reach and retrieval. If they skip that test, they later lose minutes each day to awkward chair clearance and repeated item hunting.
A practical example shows the risk clearly. A person sets the keyboard 5 cm too far forward, then places a reference notebook on the side shelf; after 20 minutes of typing, their wrist angle forces a forward lean, and the notebook becomes reachable only after standing. The fix is measurable: they slide the desk back until the monitor height matches comfort and they can retrieve the notebook without shifting more than 10 cm.
Here is the unexpected angle: a layout can feel “open” while still failing focus, because sightlines and clutter determine whether the brain stays on task. They should treat cable management and storage faces as part of the visual environment, not as afterthoughts.
They should run the 5-Minute Layout Test by checking reach, sit, turn, and retrieve in one continuous pass. This method also confirms the ergonomic desk setup and supports a stable work triangle during real use.
- Reach — Sit in the chair and extend to the keyboard, mouse, and notepad without leaning forward.
- Sit — Verify the monitor height aligns with eye level and the screen does not force neck flexion.
- Turn — Rotate in the seat to access drawers while maintaining chair clearance from the desk edge.
- Retrieve — Grab a frequently used item from the storage zone and return it without standing.
They then adjust for distractions by testing sightlines, noise, and visual clutter from the seated position. If a cabinet door reflects the monitor or a printer hum crosses the same time window, they should reposition or add damping.
Before committing to storage, they should use a quick iteration loop that changes only one variable per run. Each loop should include cable management checks, a second work triangle check, and a short retrieval test for the top two tools.
After the final pass, they should repeat the full test once more, because how to arrange home office furniture decisions become harder to change after anchoring shelves. They can then lock the arrangement with confidence and reduce friction for daily focus.
Make your home office layout work every day
The two most important takeaways are that the desk placement must support daily workflow and ergonomics, and that the layout needs a final circulation and access test after everything is in place. When those checks are done, the office stops being “set up” and starts functioning as a reliable workspace. The goal is not perfection at install time, but stability during real use.
Do this today: take a 10-minute work session in the current setup, then stand up, reach for your most-used items, and sit back down without shifting anything. If you notice friction, adjust one constraint immediately—chair distance, monitor height, or where cables and small tools sit—then repeat the same quick test once.