How to build bird feeders starts with matching a simple design to the birds in the yard and the weather it must handle. A well-built feeder keeps seed dry, drains fast after rain, and stays stable when squirrels, wind, and hungry birds test it daily. They don’t need fancy tools.
They do need accurate cuts, safe finishes, and hardware that won’t rust.
The process is straightforward: pick a feeder style, prep materials, cut parts, assemble a sturdy tray and frame, add a roof and drainage, then hang or mount it securely. After installation, consistent cleaning and smart placement keep birds returning while reducing disease risk. One small build can support dozens of visits per day once birds learn it’s reliable.
Choose the Right Feeder Style for Local Birds
They should start by observing which birds already visit: finches, sparrows, chickadees, cardinals, or woodpeckers. The feeder style controls who can use it, how fast seed disappears, and how messy the area gets. A tray feeder attracts many species but can invite larger birds and squirrels.
They can choose from a few proven builds:
- Hopper feeder: versatile, weather-protected, good for mixed seed.
- Platform/tray: easiest build, best for quick visibility, needs frequent cleaning.
- Tube feeder: great for finches, requires purchased tube/ports or a kit.
- Suet cage mount: ideal for woodpeckers, pairs well with a tray feeder.
Pro tip: they should match seed to feeder (sunflower for hopper/tube, nyjer for finch tubes). Common mistake: building too large; oversized trays collect wet seed and spoil faster.
Gather Tools and Materials Before You Start
They’ll work faster if everything is on hand before cutting. For most DIY builds, a simple cedar hopper feeder is the best balance of durability and ease. Cedar resists rot and insects without chemical treatment.
Recommended tools:
- Measuring tape, square, pencil
- Hand saw or circular saw
- Drill/driver with bits
- Sandpaper (120–180 grit)
Recommended materials:
- 1×6 cedar or pine (avoid pressure-treated lumber)
- Exterior wood glue, 1-1/4 in exterior screws
- 1/4 in hardware cloth or acrylic panels (optional for seed windows)
- Exterior-grade sealer (bird-safe when cured)
Pro tip: stainless or coated screws reduce rust stains. Common mistake: using interior glue or nails that loosen with weather.
Measure and Cut Parts to the Correct Dimensions
They should choose one set of dimensions and stick to it. Consistent measurements keep the feeder square, which prevents roof gaps and seed leaks. A medium hopper feeder is manageable and holds enough seed for a few days.
| Part | Quantity | Suggested Size |
|---|---|---|
| Base/tray | 1 | 10 in x 8 in |
| Side walls | 2 | 10 in x 6 in |
| End panels | 2 | 8 in x 6 in |
| Roof panels | 2 | 10 in x 6 in |
They should sand cut edges lightly to remove splinters. If they add seed windows, they can cut openings in the side walls and plan for acrylic or hardware cloth backing.
Pro tip: they should dry-fit parts before drilling. Common mistake: skipping a square; small errors compound and the roof won’t sit flat.
Assemble the Feeder Frame and Seed Tray
They should build from the bottom up. First, they attach the side walls to the base, then the end panels, keeping everything square. Pre-drilling prevents cedar from splitting, especially near ends.
- Apply a thin bead of exterior wood glue on the base edges.
- Clamp or hold a side wall in place; pre-drill, then drive screws.
- Repeat for the other side wall and both end panels.
- Add a simple internal ledge (thin strip) if they want a removable floor insert for cleaning.
Now they can add a low perch lip around the tray edge if desired, but it shouldn’t block drainage. Look for wobble; if it rocks, they should correct it before moving on.
Pro tip: they should keep fasteners consistent for easier repairs later. Common mistake: over-tightening screws and stripping softwood.
Add Roof, Drainage, and Weather Protection
A roof keeps seed usable; drainage keeps birds safe. They should drill multiple 1/4 in holes in the tray base, especially near corners where water pools. If they use hardware cloth as a tray floor, it drains well and reduces wet seed clumps.
For the roof, they can create a simple peak by joining two roof panels along a ridge. Leave a small overhang on all sides to shed rain away from the tray. If they add acrylic side panels, they should leave a small gap at the bottom for airflow.
- Seal only the exterior surfaces; keep interior raw or lightly sealed.
- Let finishes cure fully before adding seed.
- Use shingles or thin metal flashing for harsh climates.
Pro tip: a 10–15° roof slope sheds water fast. Common mistake: painting inside surfaces; peeling paint contaminates seed.
Install Hanging or Mounting Hardware Securely
They should decide whether the feeder will hang or mount to a post. Hanging reduces some squirrel access but demands strong attachment points. Post mounting is stable but needs a baffle to deter climbing.
Hardware options:
- Eye bolts with washers through the roof ridge or side rails
- Chain or coated wire rated for outdoor loads
- Post bracket plus lag screws for a 4×4 mount
They should use washers to spread load and prevent wood tear-out. For hanging builds, two attachment points reduce swinging. For mounts, they should keep the feeder removable for cleaning.
Pro tip: thread-locking compound helps hardware stay tight. Common mistake: relying on small screw eyes in end grain; they pull out over time.
Place the Feeder for Safety, Visibility, and Access
Placement determines whether birds use it and whether predators can ambush them. They should position the feeder where birds can see it, but still have nearby cover to escape. Too close to dense shrubs can help cats.
- Set it 10–12 ft from thick cover, if possible.
- Keep it 5–6 ft high for easy refills and safer viewing.
- Place it 10+ ft from jump-off points like fences or low branches to reduce squirrel leaps.
Practical example: they mount a hopper feeder on a 4×4 post 6 ft high with a 20 in baffle, placed 12 ft from a hedge and 8 ft from a window. Birds learn it in days, and refills take two minutes.
Pro tip: they should add a seed-catching tray only if they can clean it weekly. Common mistake: placing it too close to windows without decals; collisions happen.
Maintain, Clean, and Refill to Keep Birds Returning
A feeder only helps birds if it stays clean and stocked with fresh seed. They should refill smaller amounts more often, especially in wet seasons. Clumped, damp seed should be discarded immediately.
Basic maintenance routine:
- Every refill: dump hulls, check drainage holes, wipe wet spots.
- Weekly: wash with hot soapy water, rinse, dry fully.
- Monthly: sanitize with a 1:9 bleach-to-water solution, rinse well, air-dry.
They should also rake or rotate the ground area to reduce waste buildup. If sick birds appear, they should remove the feeder for 1–2 weeks and clean thoroughly.
Pro tip: keeping a second feeder allows rotation while one dries. Common mistake: topping off old seed; it traps moisture and mold.
People Also Ask
What wood is best for a bird feeder?
Cedar and redwood resist rot and insects naturally. Pine can work if it’s sealed on the exterior and kept well-drained. They should avoid pressure-treated lumber because chemicals can leach into wet surfaces.
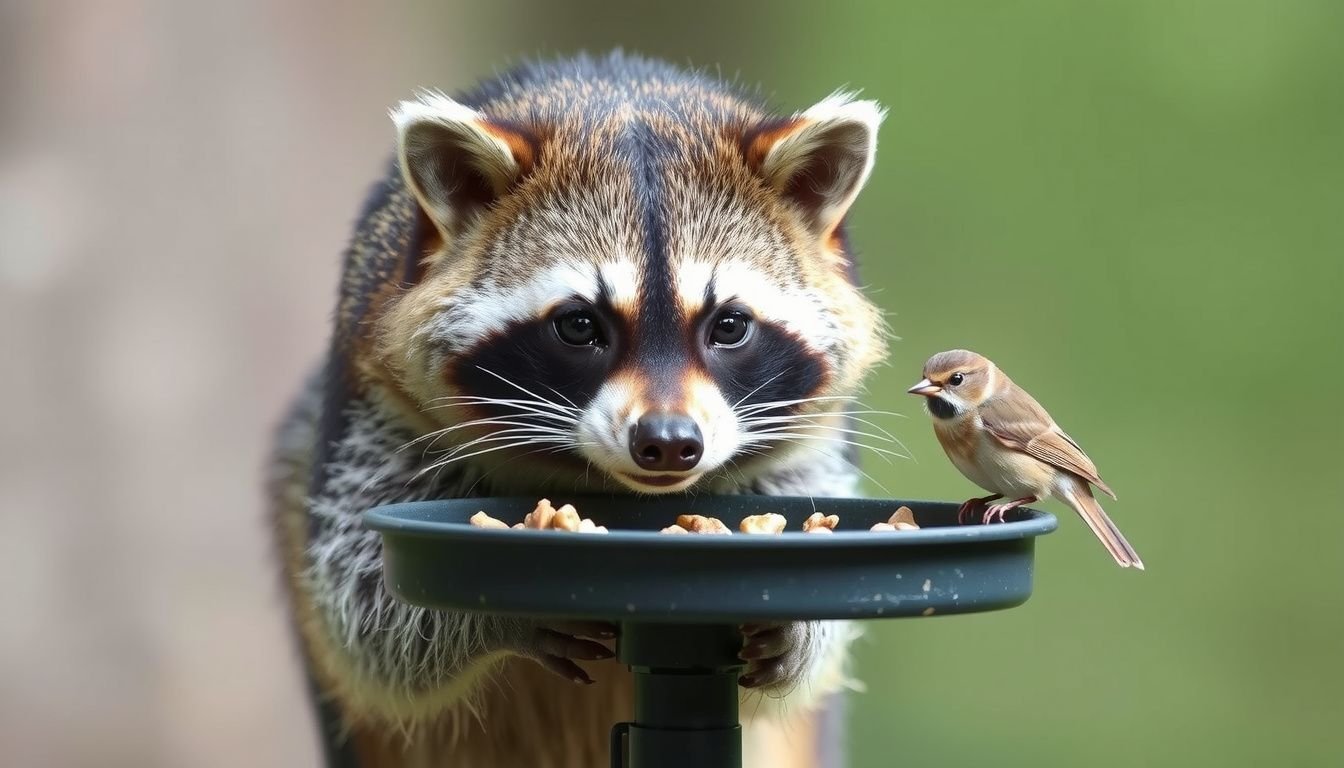
How do they keep squirrels out of a DIY bird feeder?
They should combine placement and hardware: a smooth baffle on a post, 10+ ft spacing from launch points, and sturdy hanging chains. Squirrel-resistant designs help, but no feeder is truly squirrel-proof.
Should they paint or seal a bird feeder?
They can seal exterior surfaces with an outdoor, fully cured finish. Interior surfaces should stay unpainted to avoid peeling and contamination. If they paint, they should use non-toxic paint and allow long curing time.
How big should drainage holes be?
They should drill several 1/4 in holes in the tray base, focusing on corners. More small holes beat one big hole because seed won’t spill as easily while water still drains quickly.
How long does it take birds to find a new feeder?
It often takes a few days to two weeks. They can speed adoption by placing the feeder in a visible spot, offering black oil sunflower seed, and keeping it consistently stocked.
What to Do Now
They should pick one feeder style and commit to a simple first build, then improve it after observing bird behavior. Next, they should buy rot-resistant wood, exterior screws, and weather-safe hardware, then cut parts carefully and dry-fit before assembly.
After installation, they should track three things for two weeks: which species visit, how fast seed disappears, and whether moisture collects in the tray. Small tweaks—more drainage holes, a bigger roof overhang, or a baffle—usually solve most issues. Once the feeder runs clean and dry, they can add a second feeder type, like a suet cage, to attract more species.
Related read: How Do Birds Know Where Bird Feeders Are? Key Cues